In an era of digital convenience, Apple Wallet has emerged as a game-changer for navigating and making payments in public transit. This step-by-step guide will walk you through the process, ensuring a stress-free and efficient transit experience.
Interesting articles:
- Automating Tasks with Automator and Shortcuts on Mac: A Step-by-Step Guide
- Using Spotlight for Advanced Search: A Step-by-Step Guide
Mobile Payment Basics
Understanding the concept of mobile payments for public transit is crucial. This technology eliminates the need for physical cards and allows you to use your smartphone for seamless transactions. While there are various platforms available, including Google Wallet, we’ll focus on the step-by-step process using Apple Wallet.
Benefits of Apple Wallet
- Quick and Convenient Payments: The simplicity of tapping your device for payment enhances the overall transit experience.
- Express Transit Integration: Apple Wallet’s Express Transit feature allows for faster transactions, eliminating the need for authentication with Face ID, Touch ID, or a passcode.
- Global Compatibility: Apple Wallet seamlessly integrates with various transit systems worldwide, making it a reliable choice for travelers.
Setting Up Apple Wallet for Transit
iPhone Users
1. Adding Cards to Apple Pay:
- Open the Wallet app on your iPhone.
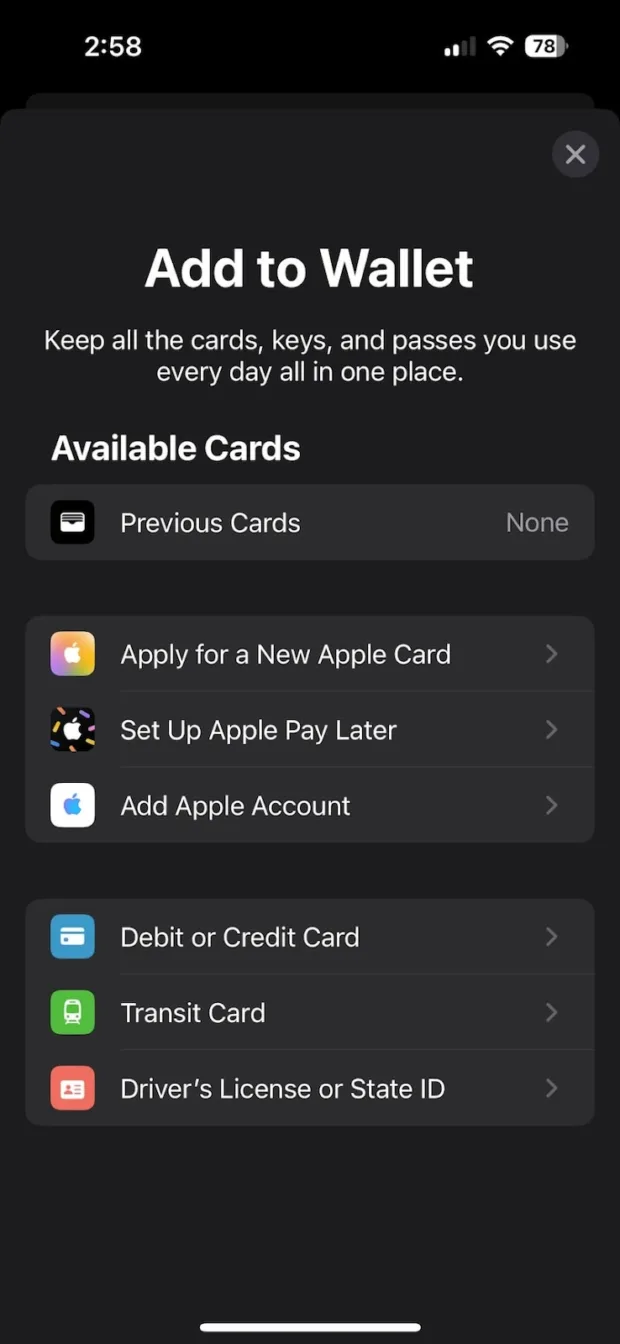
- Tap the “+” sign to add a new card.
- Follow the prompts to scan or manually enter your credit/debit card details.
- Validate your card through email, text, or a phone call to the bank.

2. Selecting Express Transit Card:
- Go to Settings > Wallet & Apple Pay.
- In the Transit Cards section, choose the Express Transit Card.
- Select the card you wish to use for seamless transit payments.
Tips for Effortless Transit Payments
- Ensuring Device Compatibility:
Before embarking on your journey, ensure that your device is compatible with Apple Wallet transit payments. Check for the latest updates and optimize your settings. - Using the Same Device for Entry and Exit:
For a smooth transition during your journey, make sure to use the same device for both entry and exit points. - Setting Up Apple Pay for iPhone and Apple Watch:
Configure Apple Pay on both your iPhone and Apple Watch for added convenience. This allows flexibility in choosing the device for payments.
Exploring Apple Wallet Transit Features
Global Presence
1. Cities and Countries with Apple Wallet Transit:
- Apple Wallet has transformed public transit experiences in various locations globally. Check for availability in your city or country.
2. User Experiences and Success Stories:
- Real-life accounts showcase the positive impact of Apple Wallet on transit experiences. Learn from the success stories of other users.
Navigational Assistance
1. Apple Wallet Maps Integration:
- Explore how Apple Wallet assists with navigation within transit systems, providing real-time updates and station details.
Advanced Features and Troubleshooting
- Power Reserve Functionality:
If your iPhone is low on battery, the Power Reserve feature ensures you can still use Apple Pay Express Transit for up to five hours after receiving a low battery notification. - Managing Multiple Cards:
Switch between cards effortlessly within Apple Wallet, providing versatility for different payment methods. - Troubleshooting Tips and FAQs:
Familiarize yourself with common issues and their solutions to ensure a smooth transit experience.
Future Trends and Conclusion
Get a glimpse into the future of Apple Wallet for transit with upcoming features and enhancements.
Embrace the convenience of Apple Wallet for your transit needs. This step-by-step guide ensures you make the most of this revolutionary technology, enhancing your public transit experience. Safe travels!
