Quick Answer: To change your Mac username, create a new admin account, change the home directory and username, and verify changes before logging back in.
User Accounts on Mac
Before proceeding with changing your username, it’s essential to understand the different types of user accounts on Mac:
- Administrator: Full privileges, including adding/removing users, changing system settings, and installing applications.
- Standard: Best for daily use, allowing access to applications and media storage without admin privileges.
- Sharing Only: Provides read-only access to shared files and folders.
- Guest User: Password-free access with automatic deletion of data upon logout.
- Group: Assigns specific access privileges to all members of a group.
Creating separate user accounts ensures better data safety and personalization.
Preparing for the Change
Before initiating any changes, it’s crucial to back up your Mac. Consider using Time Machine, Disk Utility, iCloud, or manually copying files to an external drive.
Creating a New User Account
- Open System Settings or System Preferences.
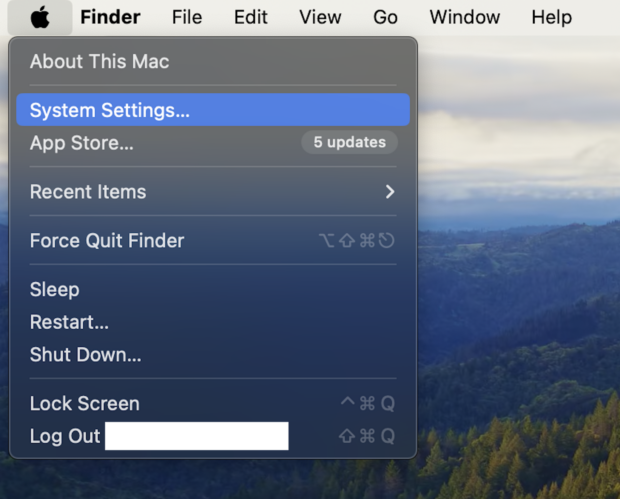
- Choose the Users & Groups category.
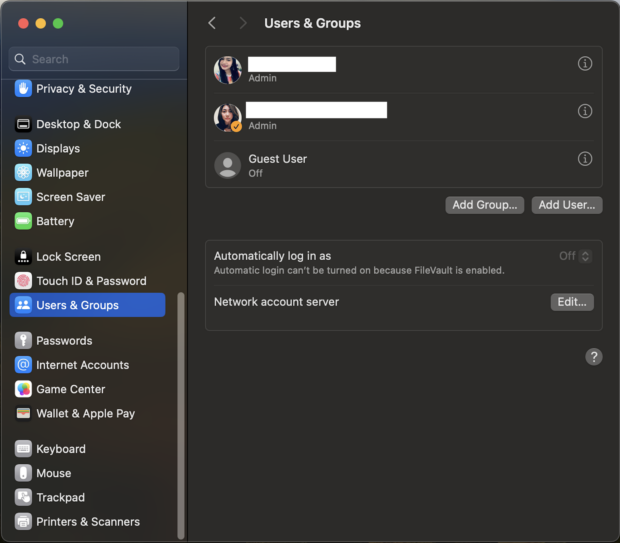
- Add a new account, ensuring the account type is set to Administrator.
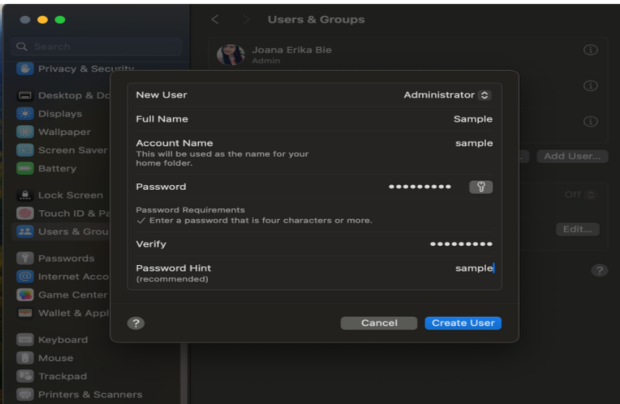
Logging into the New Administrator Account
After creating the new admin account, log out of your current account and sign in to the newly created admin account.
Changing the Home Directory Name
- Navigate to the Users Folder.
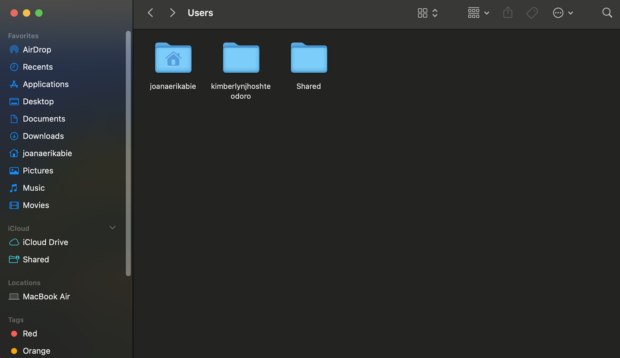
- Right-click the Home folder of the user account you want to rename.
- Select “Rename” and input your new preferred username.
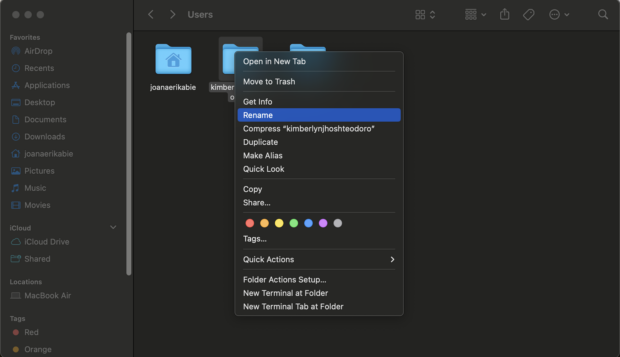
Changing the Account Username
- Access Users & Groups.
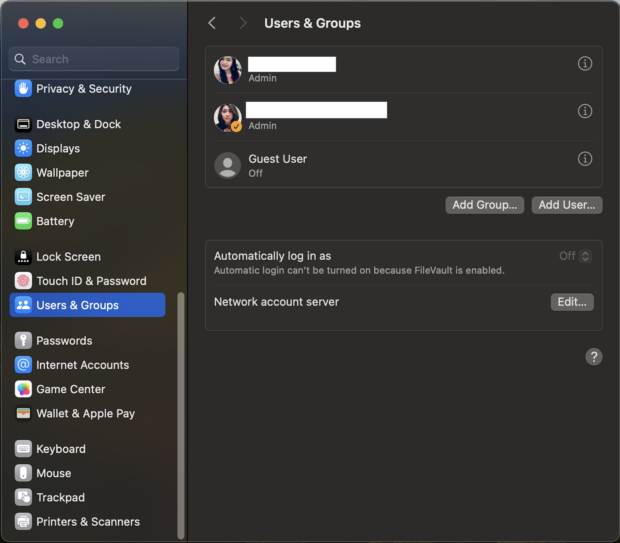
- Right-click the administrator account.
- Select “Advanced Options” and unlock the account.
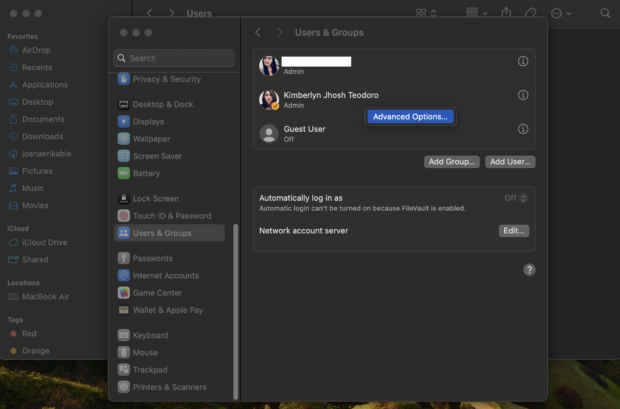
- Modify the User Account Name and Home Directory Name to match the new username.
- Click “OK” to confirm the changes.
Verifying Changes and Logging Back In
Ensure everything is in working order before logging back into the renamed account.
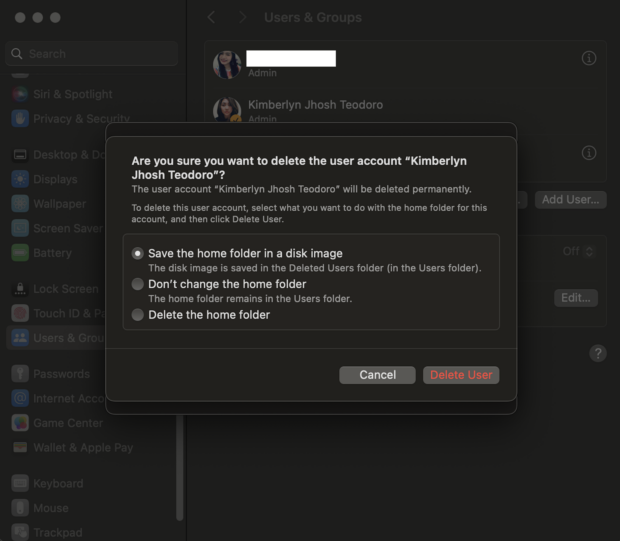
Deleting Secondary Administrator Account (if created)
If you created an additional admin account, follow these steps to remove it:
- Go to System Settings/Preferences > Users and Groups.
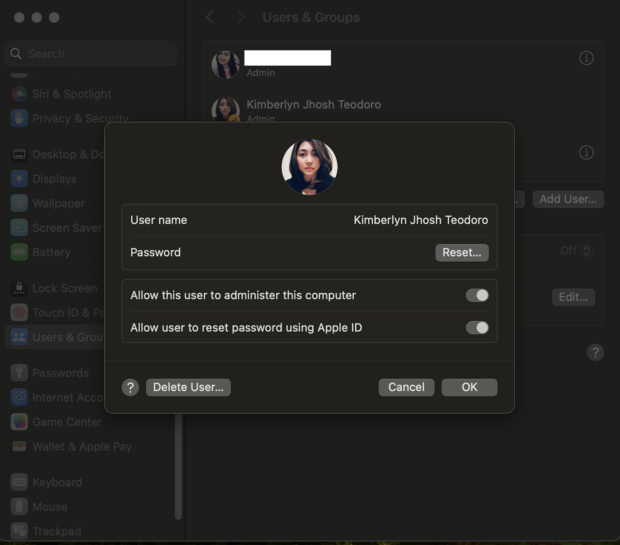
- Select the account and choose the “Delete Account” option.
Changing Your Mac Account’s Full Name
- Open System Settings:
- Click the Apple menu and select “System Settings.”
- Edit Full Name:
- Under “Users & Groups,” right-click your account, select “Advanced Options,” and edit the “Full Name” field.
- Click “OK” to confirm.
Conclusion
Changing your Mac username is a manageable task, but it requires careful execution to avoid complications. By following this step-by-step guide, you can personalize your Mac experience without compromising your data. Always ensure you have a backup ready to restore your system quickly in case of any issues.
